Hat embroidery is one of the most popular ways to show logos and brand names. Many businesses, sports teams, and clothing brands use embroidered hats because they look clean and professional. A well-made embroidered cap can leave a strong first impression and help a brand stand out.
Before stitching starts, the logo must go through Custom Hat Embroidery Digitizing. This process changes normal artwork into a stitch file that embroidery machines can read. A clean and well-prepared logo helps the machine create smooth stitches and sharp details on hats.
In this guide, you will learn easy ways to prepare logos for hat embroidery. We will cover artwork tips, digitizing basics, stitch settings, cap types, and common mistakes. The goal is to help beginners and business owners create better embroidery results with less trouble.
Why Hat Embroidery Needs Special Preparation
Hat embroidery is different from flat embroidery on shirts or jackets. Caps have curved surfaces and hard front panels. These shapes can affect stitch quality if the logo is not prepared correctly.
Common Problems with Hat Embroidery
- Uneven stitching
- Thread breaks
- Small text issues
- Poor logo shape
- Fabric pulling
- Gaps in stitches
Proper logo setup helps prevent these problems before stitching begins.
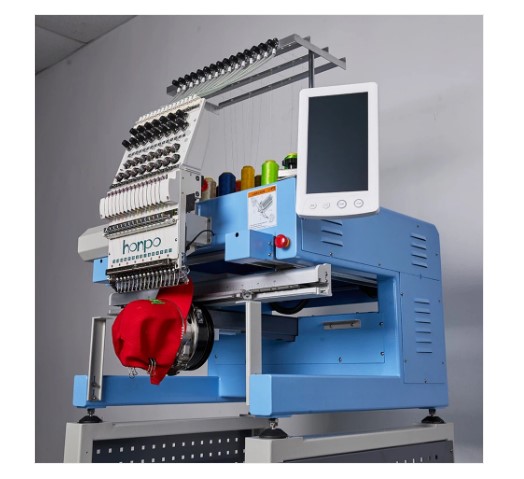
Understanding Hat Embroidery Basics
Embroidery machines stitch logos using thread and needles. The machine follows a digitized embroidery file that tells it where to place each stitch.
What Makes Hat Embroidery Different?
Curved Surface
Caps are not flat like shirts. The curved front changes how stitches behave.
Thick Material
Many hats use thick fabric and hard backing.
Smaller Stitch Area
Most caps have limited space for designs.
Center Seam
The middle seam on hats can affect stitching quality.
Professional digitizers adjust designs carefully to work around these challenges.
Start with High-Quality Artwork
Good artwork is the first step to clean embroidery.
Best Artwork Types for Hat Embroidery
Vector Files
Vector artwork gives clear lines and sharp shapes.
High-Resolution Images
Clear images are easier to digitize.
Simple Logos
Simple designs stitch better on hats.
Low-quality images can create messy stitch paths and rough embroidery.
Keep the Logo Simple
Simple logos work best for embroidery.
Why Simple Designs Stitch Better
Small details may disappear during stitching. Thick thread cannot always copy tiny artwork perfectly.
Avoid Very Small Text
Tiny letters are hard to read on hats.
Reduce Extra Details
Too many small shapes create rough stitching.
Use Bold Lines
Thicker lines are easier to stitch cleanly.
Simple designs usually look more professional on caps.
Choose the Right Logo Size
Size matters in hat embroidery.
Common Hat Embroidery Sizes
Front of Hat
Most front logos are between 2 inches and 4 inches wide.
Side of Hat
Side logos are usually smaller.
Back of Hat
Back embroidery often includes names or small text.
Very large logos may not fit the curved surface correctly.
Pick the Best Stitch Types
Professional digitizers use different stitch types for different parts of the logo.
Main Stitch Types Used on Hats
Satin Stitch
Best for text and borders.
Fill Stitch
Used for large logo areas.
Run Stitch
Good for outlines and fine details.
The correct stitch type helps keep embroidery smooth and balanced.
Why Stitch Density Matters
Stitch density controls how close the stitches sit together.
Problems with Too Much Density
- Thread breaks
- Stiff embroidery
- Fabric pulling
- Needle breaks
Problems with Low Density
- Gaps in the design
- Weak coverage
- Poor logo appearance
Professional digitizers adjust density based on fabric and logo size.
Understanding Underlay Stitches
Underlay stitches support the top embroidery stitches.
Why Underlay Is Important
- Keeps stitches stable
- Helps shapes stay clean
- Reduces fabric movement
- Improves stitch coverage
Good underlay helps hats keep a neat and sharp logo shape.
Choosing the Right Hat for Embroidery
Not all hats work the same for embroidery.
Common Hat Types
Structured Hats
These hats have a firm front panel. They are popular for logos.
Unstructured Hats
These hats are softer and more flexible.
Snapback Caps
Popular for sports and fashion brands.
Trucker Hats
These hats have mesh backing and foam fronts.
Each hat type may need different embroidery settings.
The Role of Stabilizer in Hat Embroidery
Stabilizer supports the cap during stitching.
Why Stabilizer Helps
- Prevents shifting
- Reduces puckering
- Supports stitches
- Improves stitch quality
Many embroiderers use cut-away stabilizer for cap embroidery because it gives strong support.
Why Center Seam Problems Happen
Most hats have a center seam on the front. This seam can cause stitching problems.
Common Center Seam Issues
- Uneven stitching
- Needle deflection
- Gaps near the seam
- Thread breaks
Professional digitizers often avoid placing small details directly over the seam.
Choosing the Right Needle
The needle affects stitch quality and thread flow.
Best Needle Types for Hats
Sharp Needles
Good for firm cap materials.
Heavy-Duty Needles
Used for thick hats and dense designs.
Titanium Needles
Long-lasting and strong for commercial embroidery.
A dull needle can damage both thread and fabric.
Why Thread Quality Matters
Good thread creates cleaner embroidery.
Benefits of High-Quality Thread
- Smooth stitching
- Strong color
- Fewer thread breaks
- Better shine
Cheap thread may create lint and uneven stitches.
How Professional Digitizers Plan Hat Designs
Experts think about fabric, shape, and stitch direction before digitizing starts.
Important Planning Steps
Study the Hat Surface
The curve affects stitch angles.
Reduce Small Details
Tiny shapes may not stitch clearly.
Set Proper Pathing
Smooth stitch order reduces trims and thread jumps.
Use Correct Pull Compensation
This helps keep shapes balanced after stitching.
Planning is one of the biggest reasons expert embroidery looks cleaner.
Why Testing Is Very Important
Even good designs should always be tested.
What Professionals Check During Testing
Thread Breaks
Frequent breaks may mean density is too high.
Design Shape
The logo should stay balanced on the cap.
Stitch Coverage
No fabric should show through the design.
Registration
All design parts should line up correctly.
Testing helps fix problems before full production.
Common Hat Embroidery Mistakes
Many beginners make the same mistakes during logo preparation.
Beginner Mistakes to Avoid
Using Very Small Text
Small letters often become unreadable.
Choosing Complex Artwork
Too much detail can ruin stitch quality.
Ignoring the Hat Seam
The seam affects stitching balance.
Skipping Test Runs
Testing helps catch problems early.
Using Poor Stabilizer
Weak support can cause shifting.
Learning from mistakes helps improve embroidery skills faster.
Best Tips for Clean Hat Embroidery
Professional embroidery shops follow careful steps to create sharp designs.
Helpful Embroidery Tips
Keep Logos Simple
Simple shapes stitch more smoothly.
Use Good Digitizing
Clean files create cleaner embroidery.
Match Needles with Fabric
Correct needles improve stitch quality.
Slow the Machine Speed
Slower speed helps reduce thread breaks.
Watch the Machine During Stitching
Quick action can stop damage early.
These habits improve embroidery quality and reduce mistakes.
Why Experience Matters in Hat Embroidery
Hat embroidery is harder than flat embroidery because of the curved shape and thick materials. Experience helps digitizers understand how stitches react on different caps.
Professional digitizers learn through:
- Daily practice
- Test stitching
- Machine setup knowledge
- Fabric experience
- Design correction work
This real-world experience helps them create cleaner and smoother embroidery designs.
How Good Embroidery Helps Businesses
Professional hat embroidery can improve a brand image.
Benefits of Quality Hat Embroidery
- Better customer trust
- Stronger brand look
- Long-lasting designs
- Professional appearance
- Higher product value
Many businesses use embroidered hats for marketing, uniforms, and team wear.
Signs of a Well-Prepared Hat Logo
A good embroidery design should look smooth and balanced.
Features of High-Quality Hat Embroidery
- Clean lettering
- Smooth fills
- Sharp edges
- Balanced thread tension
- No puckering
- Even stitch coverage
These details help embroidery stand out and look professional.
How Beginners Can Improve Faster
Learning hat embroidery takes time, but simple practice helps a lot.
Beginner-Friendly Advice
Start with Simple Logos
Easy designs help build confidence.
Practice on Cheap Caps
Testing saves money on expensive products.
Learn Machine Settings
Understand speed, tension, and needle setup.
Watch Expert Work
Study clean embroidery carefully.
Keep Testing Designs
Practice improves stitch quality over time.
Small improvements lead to better embroidery results.
Final Thoughts
Preparing logos for hat embroidery takes careful planning and the right setup. Clean artwork, proper digitizing, good thread, correct stabilizer, and smart stitch settings all work together to create smooth embroidery designs.
Simple logos often stitch best on caps because hats have curved surfaces and limited space. Professional digitizers understand how to balance stitches, reduce stress on fabric, and create designs that run smoothly on embroidery machines.
Testing is also very important. Even strong designs should be checked on real hats before full production starts. With practice, patience, and good materials, anyone can improve their hat embroidery results and create clean, professional-looking embroidered caps.